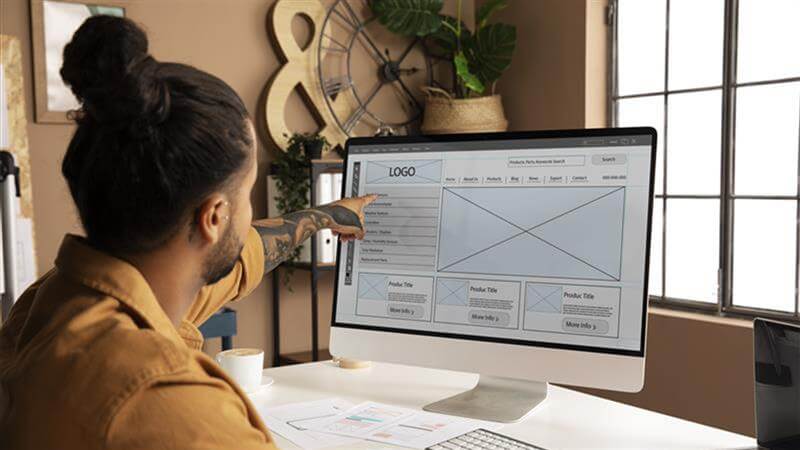
In today’s digital-first world, a well-designed website is essential for every business, freelancer, and startup. While tools like Figma and XD are popular, Photoshop remains one of the most powerful and versatile platforms for creating high-quality website layouts.
If you’re wondering how to make website design in Photoshop, this detailed guide explains exactly how to plan, design, and export a professional web layout even if you’re a beginner.
This step-by-step blog is tailored for designers, students, agencies, and entrepreneurs who want to learn the complete Photoshop web design process.
Why Use Photoshop for Website Design?
Before diving in, it’s important to understand why many designers still prefer Photoshop for website UI:
- ✔ Full control over layers, shadows, and effects
- ✔ Perfect for high-resolution hero banners and graphics
- ✔ Easy to export assets for developers
- ✔ Ideal for pixel-perfect designs
Photoshop is especially helpful when designing creative or image-heavy websites.
Step 1: Understand the Website Requirements
Before opening Photoshop, get clarity on:
- Target audience
- Type of website (business, portfolio, e-commerce, blog)
- Brand colours
- Logo & typography
- Number of pages
- Key features like banners, CTAs, forms, testimonials
A clear plan saves hours of redesigning later.
Step 2: Create a New Photoshop Document
Open Photoshop → File → New
Use recommended sizes:
- Width: 1920px
- Height: 1080px or 1500px
- Resolution: 72 DPI
- Colour Mode: RGB
- Background: White
Give the file a clear name like:
homepage-design.psd
Step 3: Set Up a Grid System
Grids ensure consistency and alignment.
Go to:
View → New Guide Layout
Use a standard 12-column grid:
- Columns: 12
- Gutter: 20px
- Margin: 60px
This grid is similar to Bootstrap and makes responsive design easier.
Also, learn more about the How Adobe Photoshop Can Enhance Your Web Design Skills
Step 4: Start Designing the Header Section
The header is the main navigation area of the website. Add:
- Logo (left side)
- Menu items (right side)
- Optional phone number or “Enquiry Now” button
- Background shape or colour
Use tools:
Rectangle Tool (U)
Text Tool (T)
Guides for spacing
Make sure the header is clean and easy to navigate.
Step 5: Create an Eye-Catching Hero Banner
This is the first section visitors see when they land on the site.
Include:
✔ A bold headline
✔ Short description
✔ A Call-to-Action (CTA) button
✔ A background image, gradient, or illustration
✔ Supporting icons or shapes
Use smart objects for images so you can edit them anytime.
Pro Tip:
Use specific themes when targeting local businesses like warm colours, relatable imagery, or industry-specific visuals.
Also, learn more about the Web Designing Course Fees in 2025
Step 6: Add the “About Us” Section
Use a clean layout with:
- A heading
- A paragraph of text
- An image of the team or office
- Bullet points or highlights
Keep line spacing balanced and text readable.
Step 7: Design the Services Section
For businesses, service sections are crucial.
You can use a 3 or 4 column layout:
Service Box → Icon → Title → Short Description → Button
Add subtle shadows and rounded corners to give a modern UI feel.
Step 8: Highlight Features or Benefits
Use icons, checkmarks, or small graphics to make your features stand out.
Example:
- ✔ Fast Delivery
- ✔ Affordable Pricing
- ✔ Support
- ✔ Custom Solutions
Keep everything aligned with the grid.
Learn more about How Adobe Photoshop is Utilized in Graphic Designing
Step 9: Add Testimonials or Social Proof
This helps build trust with users.
Use:
- Client photos
- Star ratings
- Short quotes
Make sure you use consistent fonts and colours.
Step 10: Design the Footer Area
The footer usually contains:
- Logo
- Quick links
- Contact details
- Address
- Social media icons
- Copyright
A darker background helps create visual separation.
Step 11: Maintain Consistency in Fonts & Colours
Good website design depends on:
- Using only 2–3 colours
- Using 2 fonts (headline + paragraph)
- Keeping spacing uniform
- Using consistent button shapes
Popular friendly font pairs:
- Montserrat + Open Sans
- Poppins + Roboto
- Lato + Nunito
Step 12: Organise Layers Properly
A clean PSD file is a developer’s best friend.
Do this:
- Group each section (Header, Banner, Services, Footer)
- Name layers properly
- Convert icons to smart objects
- Lock completed layers
This reduces confusion when exporting assets.
Step 13: Preview the Design
Check the design at:
View → 100%
Zoom in and verify:
- Text clarity
- Button size
- Spacing
- Alignment
- Colour contrast
Small adjustments improve overall quality.
Step 14: Export Assets for Development
Once the design is final:
Right-click layer → Export As
Export as:
- PNG or JPG for images
- SVG for icons
- WebP for modern lightweight images
Also provide:
✔ PSD file
✔ Assets folder
✔ Fonts
✔ Colour codes
✔ Spacing notes
Developers will use this to convert the design into HTML, WordPress, or any CMS.
Tips for Designing Websites in Photoshop
- Keep mobile-first design in mind
- Use modern UI styles: gradients, shadows, minimal colours
- Use royalty-free stock photos for authenticity
- Keep navigation simple and intuitive
- Avoid heavy graphics to ensure fast loading
Final Thoughts
Learning how to make website design in adobe Photoshop is easy once you understand the structure, tools, and design principles. Whether you’re a student, freelancer, or a business owner, Photoshop gives you complete creative control over your website layout.
With practice, you can create professional, pixel-perfect designs that developers can turn into fully functional websites.
